
Using T-shirt transfer paper to apply an image to ripstop
First a disclaimer: if you try this, don’t blame me for burnt $400 dollar kites, smeared images you can’t get off anymore or severe depressions if it doesn’t work for you.......
Remember I’m still experimenting with it, so I can’t give guarantees, but it seems to work fine until now.
Cause I tried it for the first time a week ago, I can’t say anything about durability: I’ve wetted and scrubbed the prints I made and they still look fine, but I don’t know what it will look like next year.
It all started cause a customer wanted a logo on his kites. The only way to do that seemed to be silk screening, but you have to soak the cloth it in acetone for a day: it roughens up the fibers so the ink can stick, but it also weakens the fabric. Not a good solution, and expensive too in small quantities.
When I got hold of some transfer paper I decided to try it on ripstop. Most people think it will melt when you iron it, but that’s not the case ( after it’s woven, ripstop is pressed at a temperature of 180 degrees Celsius to get a tighter cloth ). Polyester has even a higher melting point.
I printed some logo’s, cut them out and tried it. It worked like a dream, only thing was I forgot to mirror them, so I had to print them again.....
You have to be careful though: cause it isn’t meant for ripstop there’s a slight problem. If you apply the recommended temperature (hottest/linen setting) and according to the instructions the plastic of the transfer will melt enough to let the colors bleed. That doesn't happen on cotton cause it absorbs the liquid plastic, but on ripstop the pic starts to deform. Lower the temperature of the iron a bit and work from the back and it doesn’t happen anymore ( wool setting in my case).
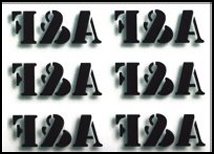
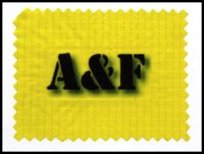
The logo on Boeder transfer paper and what it looks like on Dimention ripstop.
So here’s the way I do it:
Cut out the transfer, leaving a few mm (transparent) space around the pic.
Use a piece of cardboard to iron on: you need a smooth hard surface.
Pre - iron the spot where you want the transfer (this prevents it to strech to much when actually applying the transfer)
Put the transfer on the cardboard, sunny side up (a little piece of 2 sided tape can keep it in place). Put the ripstop over the transfer and position it. Make sure it can't slide and carefully iron the transfer on. You can easily see if you covered all: the places that didn't stick appear whitish. The trick is when you work from the backside you don't have to "melt" the whole thing through the paper : this way it sticks rapidly and the transfer doesn't bleed. It's just there as a thin layer on the ripstop.
If you did it right you can remove the paper when it’s cooled down: if you still notice some (light) spots where the transfer did not stick enough, no problem: get a piece of baking paper, place it under the transfer and now you can iron it on the backside again until the white spots are gone.
If you decide to try it out, I would appreciate some feedback: what paper you used on what fabric, the size and off course the result...
Note:
The paper I used is "Boeder inkjet T-shirt transfer paper" on both Dimention Polyant and Carrington ripstop.
 There used to be a link here
I removed it for the following reason:
Wrote a e-mail to Boeder about this application with some additional questions.... they didn't bother to answer back. I hate companies that show off with a fancy support or info e-mail adress and then don't bother to react to questions.
Next batch of transfer paper will defenately NOT be Boeder's...
There used to be a link here
I removed it for the following reason:
Wrote a e-mail to Boeder about this application with some additional questions.... they didn't bother to answer back. I hate companies that show off with a fancy support or info e-mail adress and then don't bother to react to questions.
Next batch of transfer paper will defenately NOT be Boeder's...
 Back to the index